

Nikon ZR False Color and exposure tools
The new Nikon ZR shoots excellent video, especially when using its 6K RAW codecs. However, despite having a large and bright screen, the internal exposure tools are still lacking.
The camera includes a waveform monitor, but it’s very small and difficult to read accurately. It also offers histograms and zebras, which are standard on most photo cameras but not the most effective tools for video work. Another quirk is that when recording in the R3D NE codec, the camera disables the exposure meter.
Fortunately, the ZR provides preview LUT functionality when shooting in R3D, which allows us to expand its capabilities using our Utility LUTs pack.
The pack contains preview LUTs that add much-needed exposure guidance directly to the camera.
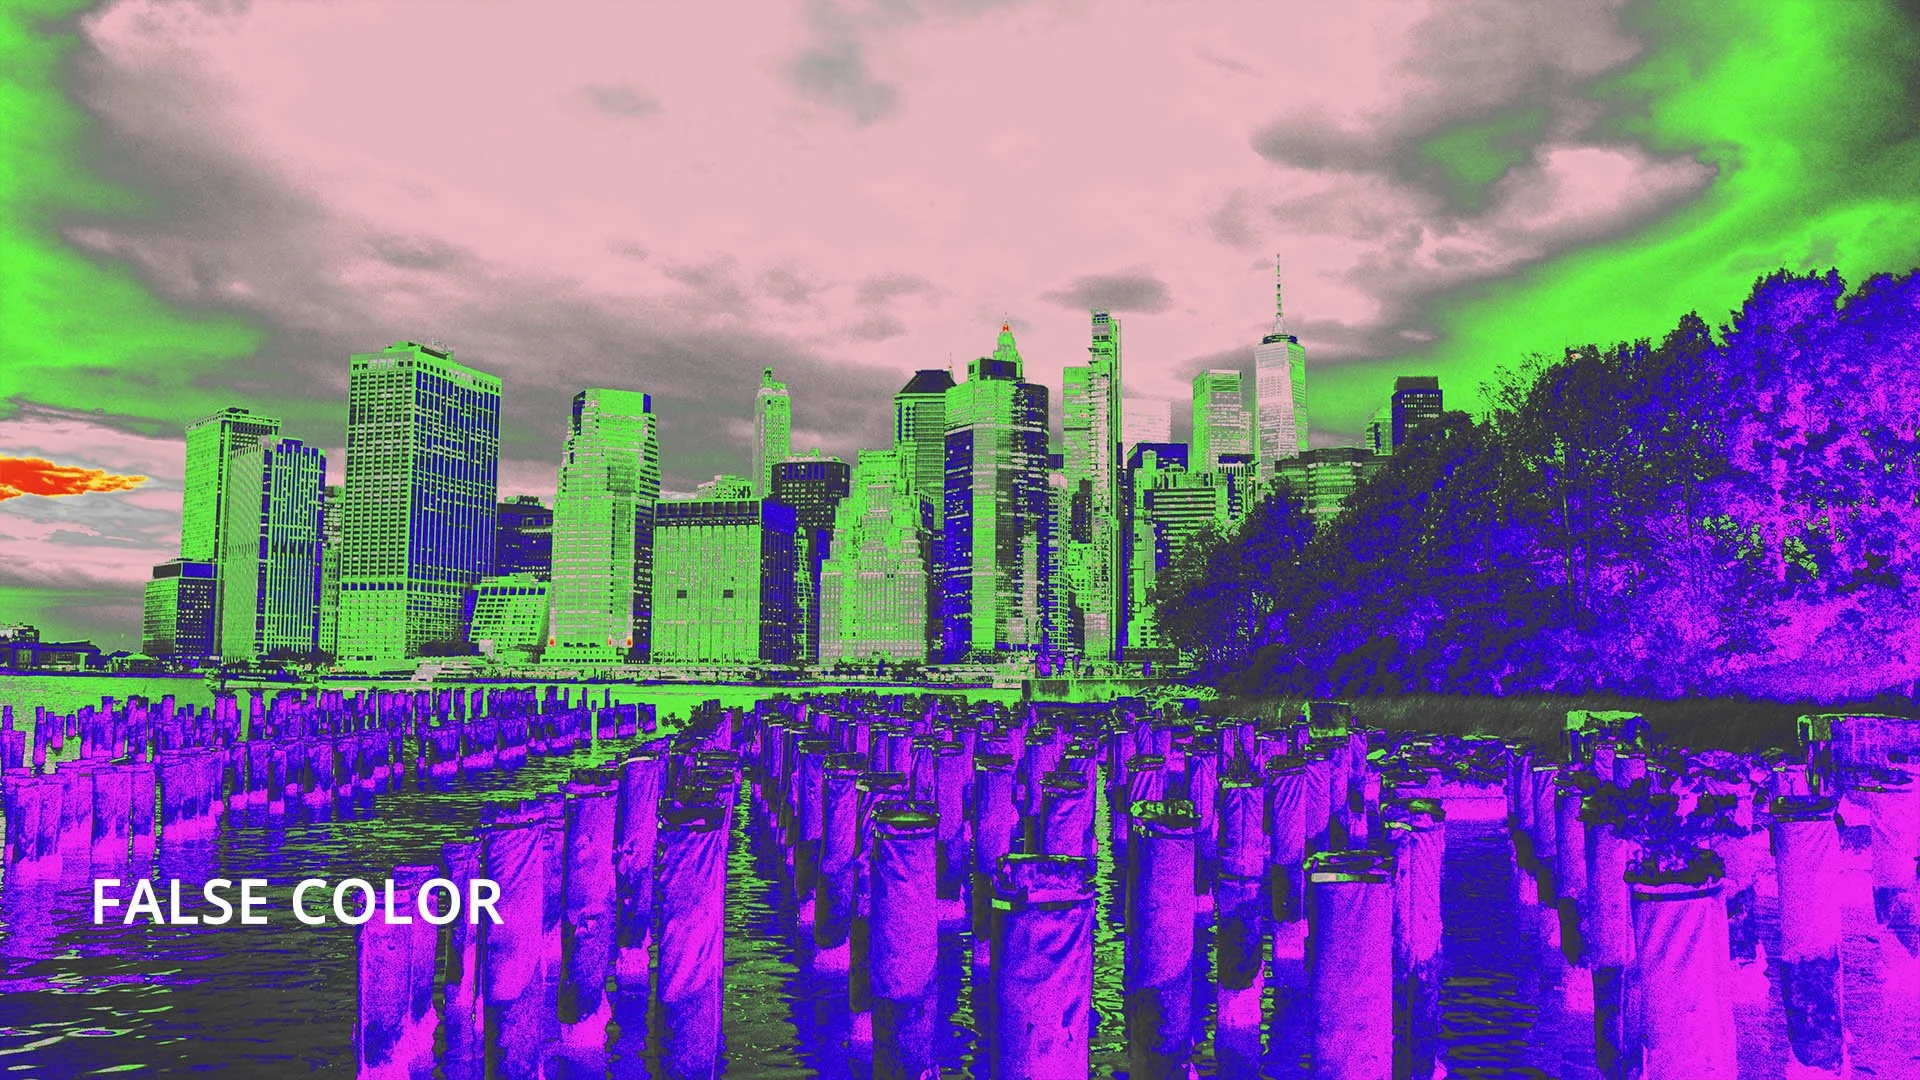
False Color


Most of you are probably familiar with false color — a tool available on many professional cameras, as well as external recorders and monitors.
False color divides the image into about ten different brightness zones, each represented by a specific color. The darkest shadows are shown as deep purple, while the brightest highlights appear as bright red.
Using false color makes it easy to see the exposure level of every part of your scene. It’s especially useful in controlled lighting setups, where you can clearly see light falloff and contrast ratios between your subject and background.
It’s also a crucial tool for matching looks and maintaining lighting continuity between different shots.
Clipping LUT
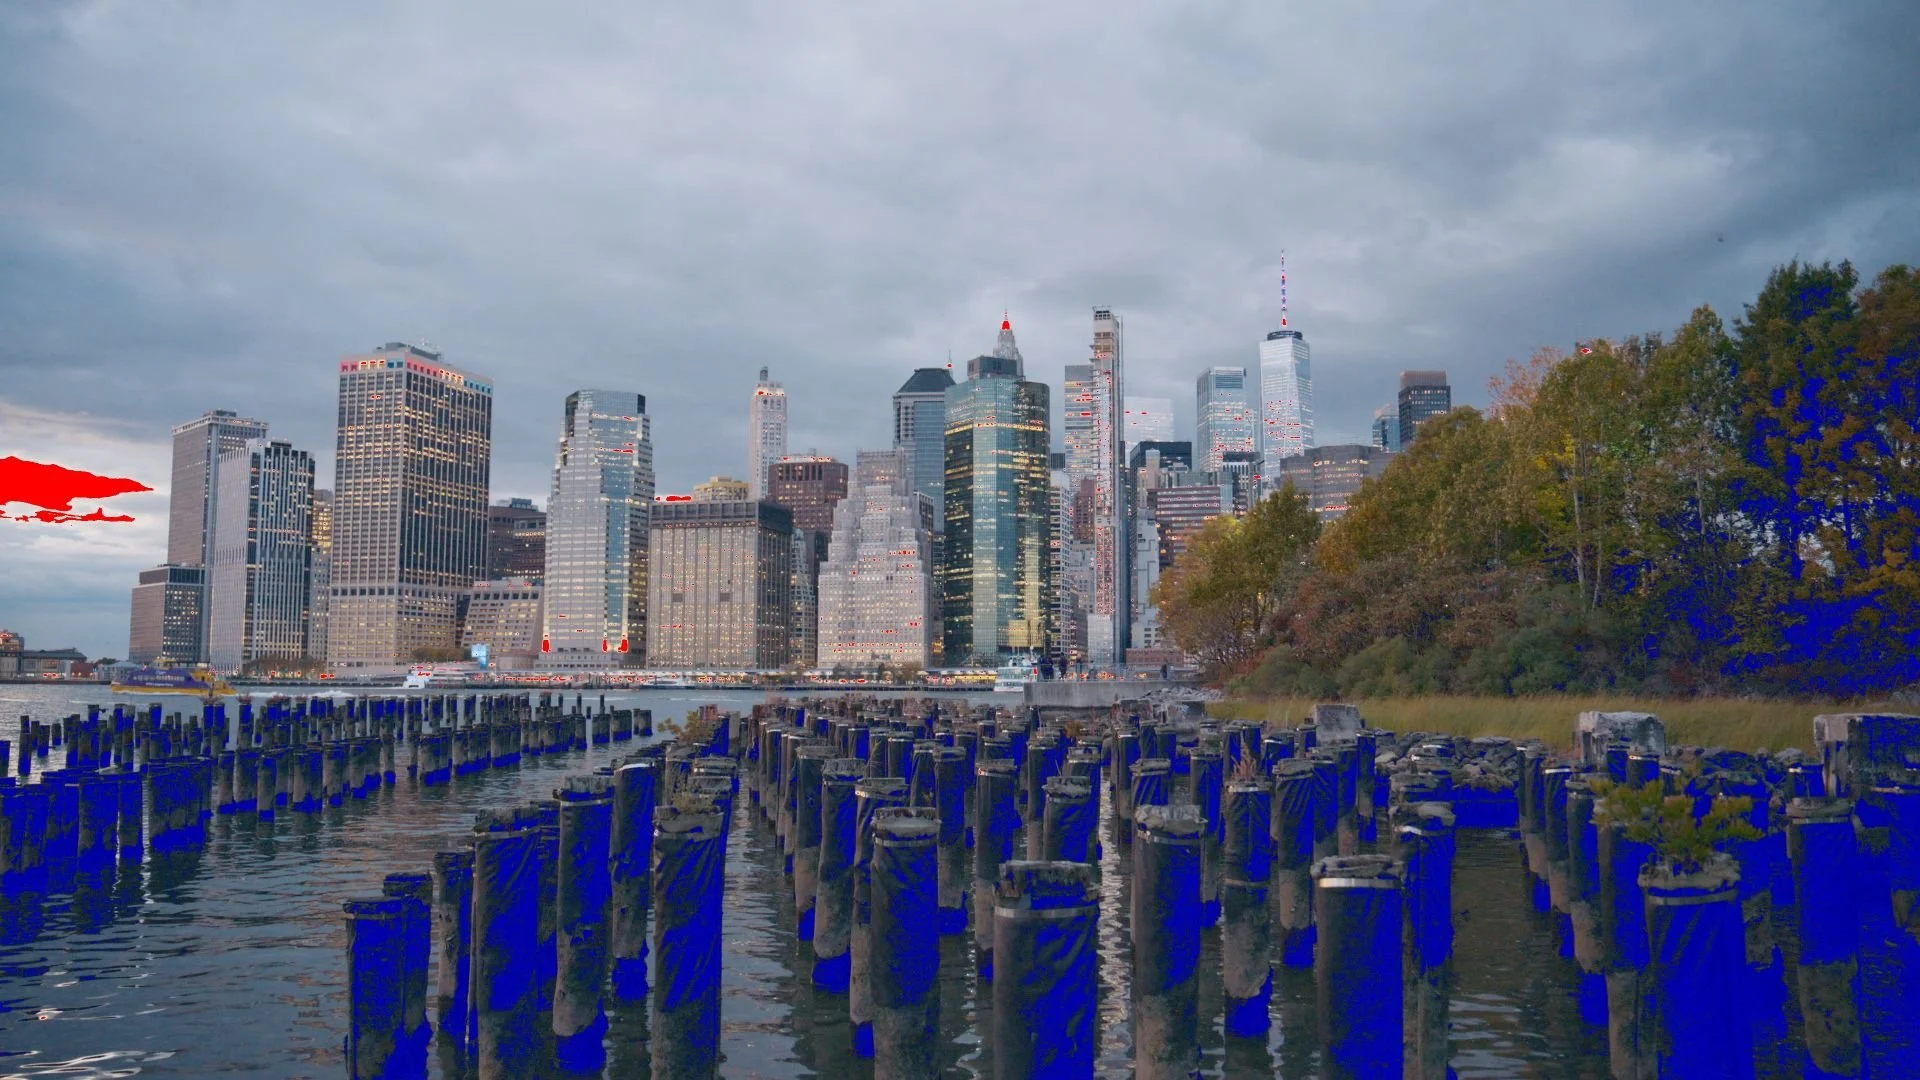
Nikon ZR preview showing clipped areas
This LUT has become my default viewing LUT, and I often use it even more than false color — especially for run-and-gun shooting.
It uses the same tone curve as the built-in Rec 709 assist LUT, but adds color indicators for clipping:
Dark blue for shadow clipping
Bright red for highlight clipping
It’s similar to using zebras, but with one key advantage — you can see both highlight and shadow clipping simultaneously, which most cameras don’t allow. It’s also much clearer and less distracting than traditional zebra overlays.
Exposure Compensation LUTs

Exposure compensation LUTs are designed for previewing the image at –1 or –2 stops.
They’re useful when you intentionally overexpose the sensor by a stop or two to achieve cleaner shadows. For example, if you’re using a fixed ND filter and want to maintain a specific aperture, you might slightly overexpose the image. In that case, these LUTs let you view the scene at a normal exposure for more accurate framing and composition.
They’re also handy when you plan to lower the exposure in post for creative reasons and want to see a preview of the final look.
Each exposure compensation LUT also includes clipping indicators, similar to the main clipping LUT.
Black & White LUT

Nikon ZR Black and white LUT overlay
A black and white LUT can be surprisingly powerful for judging lighting.
By removing color, your eyes focus more on contrast and tonal balance. Flat lighting becomes much easier to identify, and you can make more informed adjustments to your key and fill ratios.
It’s also an excellent tool for composing shots, helping you see the structure of the image without the distraction of color. A great black-and-white composition relies on geometry, framing, and negative space. When those work in grayscale, they’ll almost always work in color too, but not necessarily the other way around.
Cinema Tools Nikon ZR Utility LUTs. Features in-camera monitoring LUTs when using R3D NE codec. The pack includes exposure compensation LUTs, false color LUT, black and white LUT, and highlight and shadow clipping indicator LUT.
The pack was created to expand in-camera functionality and add exposure metering tools.